Is your Windows 11 PC feeling sluggish, freezing unexpectedly, or taking forever to load apps? The culprit is often a bloated cache. Knowing how to clear cache in Windows 11 is one of the simplest — and most effective — ways to reclaim storage space and get your computer running like new again.
In this guide, you’ll learn 7 proven methods to clear different types of cache on Windows 11, step by step. No tech degree required.
Table of Contents
What Is Cache and Why Does It Build Up?
Cache is temporary data your PC stores to help apps, browsers, and Windows itself load faster. Think of it as your computer’s short-term memory — great in small doses, but problematic when it piles up.
Over time, cache from browsers, apps, system updates, and the Windows Store accumulates and takes up gigabytes of disk space. When that happens, your PC can slow down, crash more often, or show outdated content.
Clearing it regularly is like giving your computer a fresh start.
How to Clear Cache in Windows 11 — 7 Methods
Let’s walk through every type of cache you should be clearing — and exactly how to do it.
Method 1: Clear Temporary Files Using Settings
This is the easiest and most recommended starting point for most users.
- Press Windows + I to open Settings.
- Go to System → Storage.
- Click on Temporary files.
- Windows will scan and display categories of junk files (Temp files, Thumbnails, Recycle Bin, etc.).
- Check the boxes for what you want to remove.
- Click Remove files and confirm.
💡 Pro Tip: Always check “Temporary Internet Files” and “Thumbnails” — these two alone can free up several gigabytes.
This method handles a broad sweep of cached system data and is safe for all users.
Method 2: Run Disk Cleanup
Disk Cleanup is a classic Windows utility that’s still fully functional in Windows 11.
- Press Windows + S and search for Disk Cleanup.
- Select your C: drive and click OK.
- Wait for the scan to complete.
- Check all relevant boxes, then click OK → Delete Files.
- For a deeper clean, click Clean up system files and repeat the process.
⚠️ Warning: Do not delete “Windows ESD Installation Files” unless you are sure you won’t need to reset Windows in the near future.
This tool is especially useful after Windows updates, which tend to leave large leftover system files behind.
Method 3: Clear the DNS Cache
The DNS cache stores records of websites you’ve visited to speed up future connections. A corrupted DNS cache can cause websites to fail to load or display outdated pages.
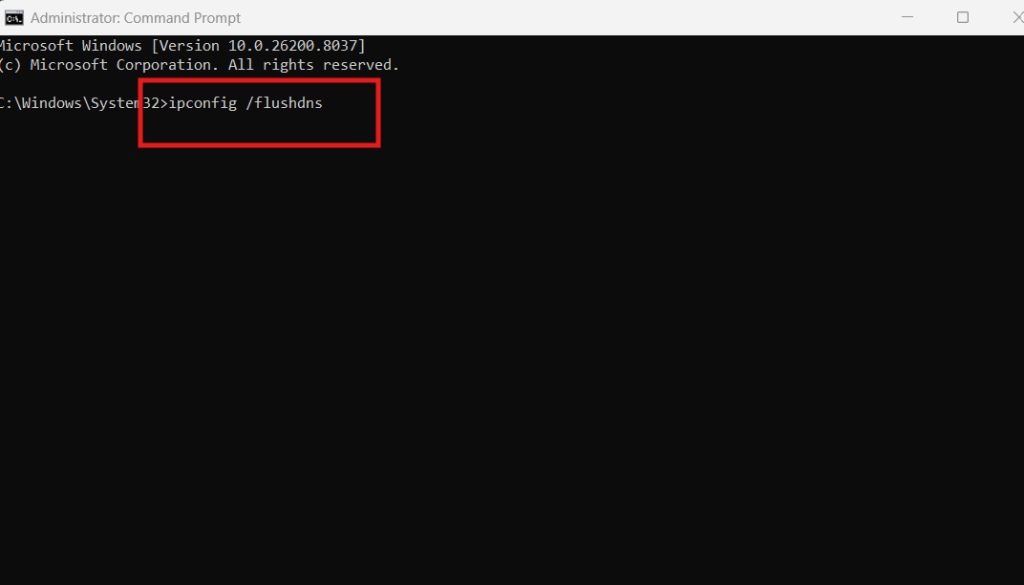
- Press Windows + S and search for Command Prompt.
- Right-click it and select Run as administrator.
- Type the following command and press Enter:
ipconfig /flushdns- You’ll see the message: “Successfully flushed the DNS Resolver Cache.”
That’s it. This takes less than 10 seconds and can instantly fix browsing issues.
💡 Pro Tip: If a website you visit regularly starts behaving oddly or refusing to load, flushing your DNS cache should be your first troubleshooting step. For more network fixes, check out [link: how to fix internet connection on Windows 11 → /fix-internet-connection-windows-11].
Method 4: Clear the Microsoft Store Cache
The Microsoft Store has its own dedicated cache that can cause app download failures, loading errors, and slow store performance.
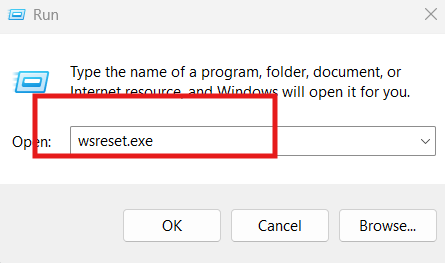
- Press Windows + R to open the Run dialog.
- Type
wsreset.exeand press Enter. - A blank Command Prompt window will appear — don’t close it.
- Wait for it to close automatically. The Microsoft Store will open once it’s done.
⚠️ Warning: Do not manually close the Command Prompt window during this process. Interrupting it can cause the Store to malfunction temporarily.
This process resets the Store cache completely and usually resolves most Store-related issues.
Method 5: Clear Browser Cache
Your browser stores images, scripts, and data from every website you visit. Over time, this slows down browsing speed and can cause display glitches.
For Microsoft Edge (built into Windows 11):
- Open Edge and press Ctrl + Shift + Delete.
- Set the time range to All time.
- Check Cached images and files and Cookies and other site data.
- Click Clear now.
For Google Chrome:
- Press Ctrl + Shift + Delete.
- Select All time as the time range.
- Check Cached images and files.
- Click Clear data.
💡 Pro Tip: You don’t need to clear cookies every time — just clearing cached images and files is usually enough to speed up your browser without signing you out of websites.
For more detail on keeping your browser fast, Microsoft’s Edge support page has official guidance on managing cache and browsing data.
Method 6: Clear the Location Cache
Windows 11 stores a history of your location data. Clearing it protects your privacy and removes stored location records apps may be pulling from.
- Open Settings (Windows + I).
- Go to Privacy & Security → Location.
- Scroll down to Location history.
- Click Clear next to “Clear location history on this device.”
This is especially useful if you share your PC with others or use location-based apps regularly.
Method 7: Clear Prefetch Files
Prefetch files help Windows load programs faster by preloading data. Over time, outdated prefetch data can actually slow things down instead.
- Press Windows + R to open Run.
- Type
prefetchand press Enter. - If prompted by a UAC dialog, click Continue.
- Select all files (Ctrl + A) and delete them (Delete key).
- Empty the Recycle Bin afterward.
⚠️ Warning: Windows will automatically rebuild prefetch files after your next few app launches. Your PC may feel slightly slower for a short period — that’s completely normal.
According to Microsoft, clearing prefetch files is safe and Windows handles the rebuild process automatically without any user action needed.
How Often Should You Clear Cache on Windows 11?
There’s no one-size-fits-all answer, but here’s a simple guideline:
| Cache Type | Recommended Frequency |
|---|---|
| Temporary Files (Settings) | Every 1–2 months |
| Disk Cleanup | Every 2–3 months |
| DNS Cache | As needed (when browsing issues occur) |
| Browser Cache | Every 2–4 weeks |
| Microsoft Store Cache | When Store errors appear |
| Prefetch Files | Every 3–6 months |
For most users, doing a full cache clear every month keeps the PC running smoothly without any noticeable slowdown.
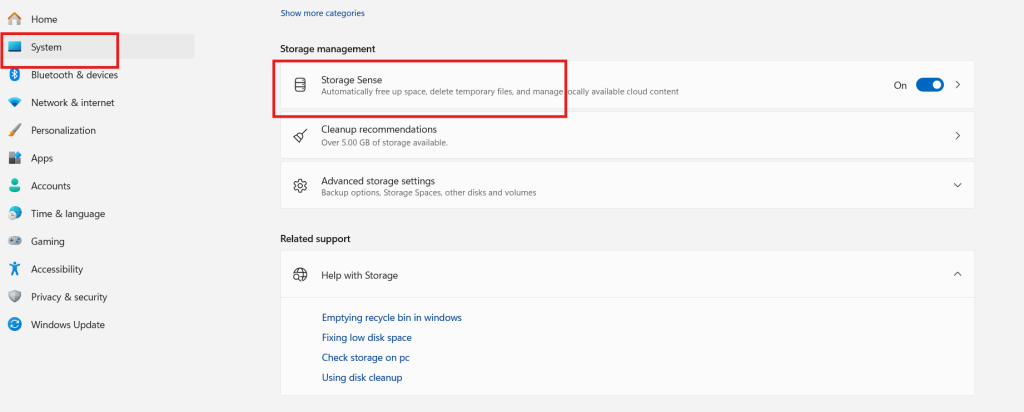
💡 Pro Tip: Enable Storage Sense in Windows 11 Settings to automatically delete temporary files on a schedule. Go to Settings → System → Storage → Storage Sense and toggle it on.
If your PC is still slow after clearing cache, there may be deeper performance issues at play. Check out [link: how to speed up a slow Windows 11 PC → /speed-up-windows-11-pc] for a complete optimization guide.
You can also refer to Microsoft’s official Storage Sense documentation for managing automatic cleanup settings on Windows 11.
Frequently Asked Questions
Q1: Will clearing cache delete my files or personal data?
No. Cache files are temporary system data, not your personal documents, photos, or installed apps. Your personal files are completely safe.
Q2: How do I clear cache in Windows 11 quickly?
The fastest method is pressing Windows + R, typing %temp%, and deleting everything in that folder. It takes under a minute.
Q3: Does clearing cache speed up Windows 11?
Yes, especially if your cache hasn’t been cleared in months. It frees up disk space and removes outdated data that can slow down app loading.
Q4: Is it safe to delete prefetch files in Windows 11?
Yes, it’s completely safe. Windows automatically rebuilds prefetch files as you use your apps — you won’t lose anything permanently.
Q5: How do I clear the RAM cache in Windows 11?
The simplest way is to restart your PC. Windows automatically flears the RAM cache on reboot. Third-party RAM cleaners are generally not recommended.
You can check this too
PC Blue Screen of Death Fix: 10 Proven Solutions to Stop BSOD
Create Restore Point on Windows PC to Protect Your System From Crashes