
Introduction
If you want to upgrade installed applications on Windows 11, you’re about to learn one of the fastest and most efficient methods available. Many users still update apps manually by visiting each software’s website, downloading installers, or checking the Microsoft Store. But Windows 11 includes a powerful built-in tool that can upgrade almost every application on your device in a single command: Winget.
Winget is the Windows Package Manager. It can update apps silently in the background, keeping your computer secure, stable, and up to date without extra effort. Your script outlines the essential steps, and this article expands them into a complete, easy-to-understand guide.
Let’s walk through how to upgrade installed applications on Windows 11 using Winget.
Table of Contents
Why You Should Upgrade Installed Applications
Keeping apps up to date is one of the simplest ways to maintain security and performance. Outdated apps may cause:
- Crashes or errors
- Slow performance
- Security vulnerabilities
- Compatibility issues
- Missing features
- Online service failures
Developers release updates to improve stability, patch security holes, and add new tools. Learning how to upgrade installed applications on Windows 11 ensures your system runs smoothly.
What Is Winget and Why Windows 11 Users Need It
Winget is the official Windows Package Manager, introduced by Microsoft to automate software installation and upgrades. It works through the Command Prompt or PowerShell, giving you full control over application updates.
With Winget, you can:
- Check for app updates
- Install updates automatically
- Upgrade known and unknown software
- Update all apps at once
Microsoft documents Winget here (DoFollow):
https://learn.microsoft.com/en-us/windows/package-manager/winget/
This command-line tool makes it incredibly easy to upgrade installed applications on Windows 11.
How to Upgrade Installed Applications on Windows 11 (Step-by-Step Guide)
Your script is correct. Below is the complete expanded version.
Step 1: Press the Windows Button
- Click the Windows Start button
- Type CMD into the search bar
This prepares you to run the necessary commands.
Step 2: Run CMD as an Administrator
- Right-click on Command Prompt
- Select Run as administrator
- Confirm the permission prompt
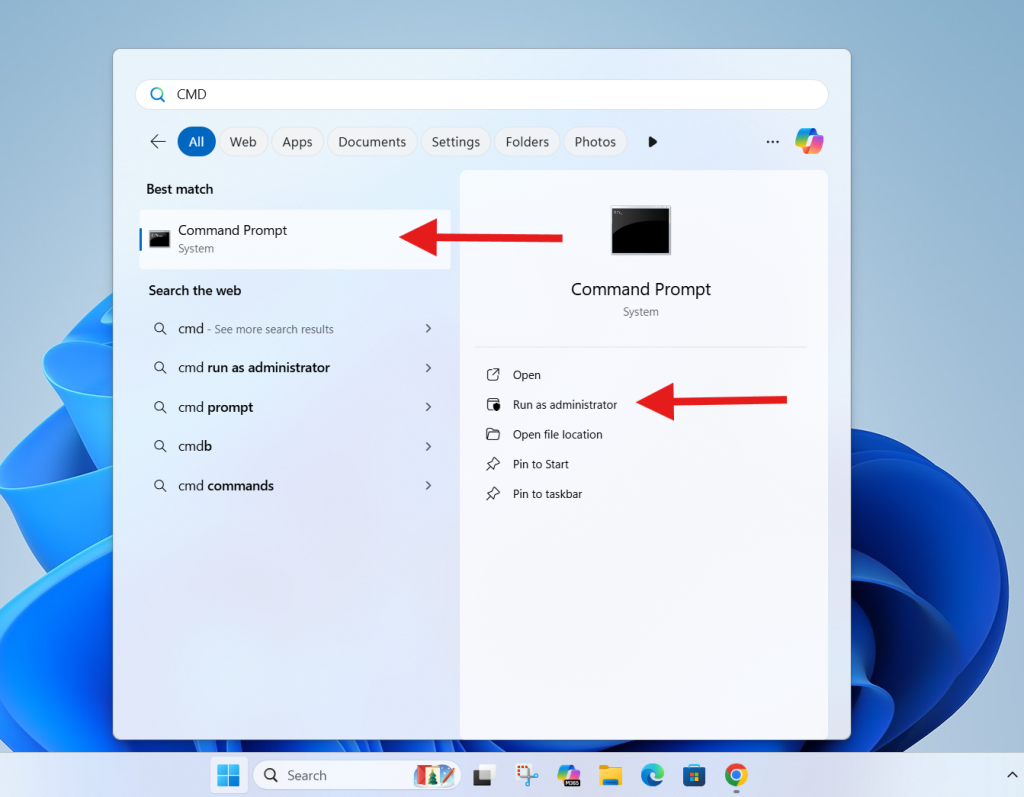
Winget requires administrative access to update system-wide applications. Running CMD normally may block certain upgrades.
Step 3: Type winget upgrade and Hit Enter
Inside Command Prompt:
winget upgrade
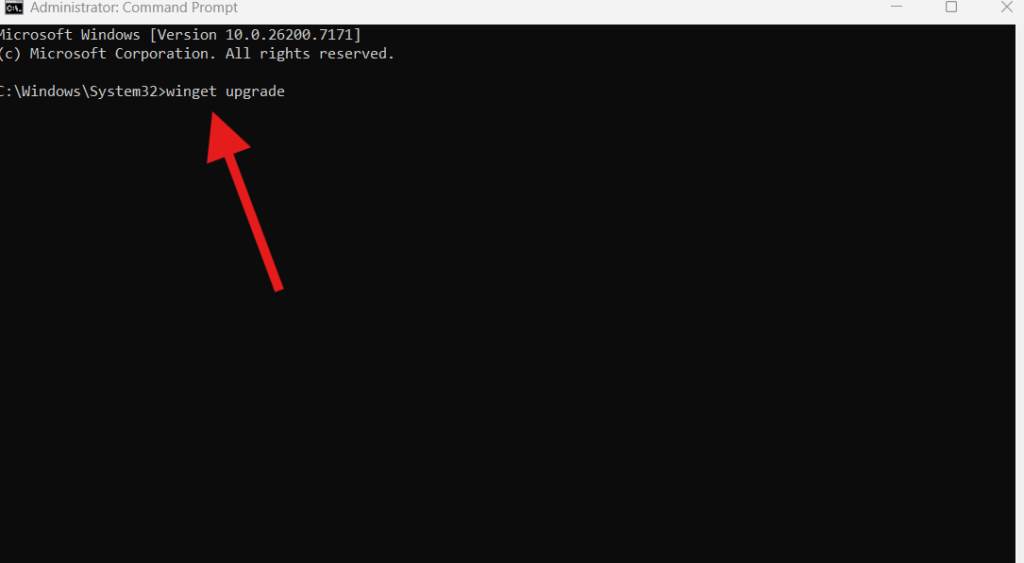
This command scans your system for all apps that have available updates. It checks:
- Microsoft Store apps
- Apps installed through installers
- Open-source tools
- Third-party utilities
After a few seconds, Winget will list:
- App names
- Current version
- Available version
- Source
If updates are available, you will see them in a clean table.
This is the first step to upgrade installed applications on Windows 11.
Step 4: Type winget upgrade --all --include-unknown
This is the command that updates everything:
winget upgrade --all --include-unknown
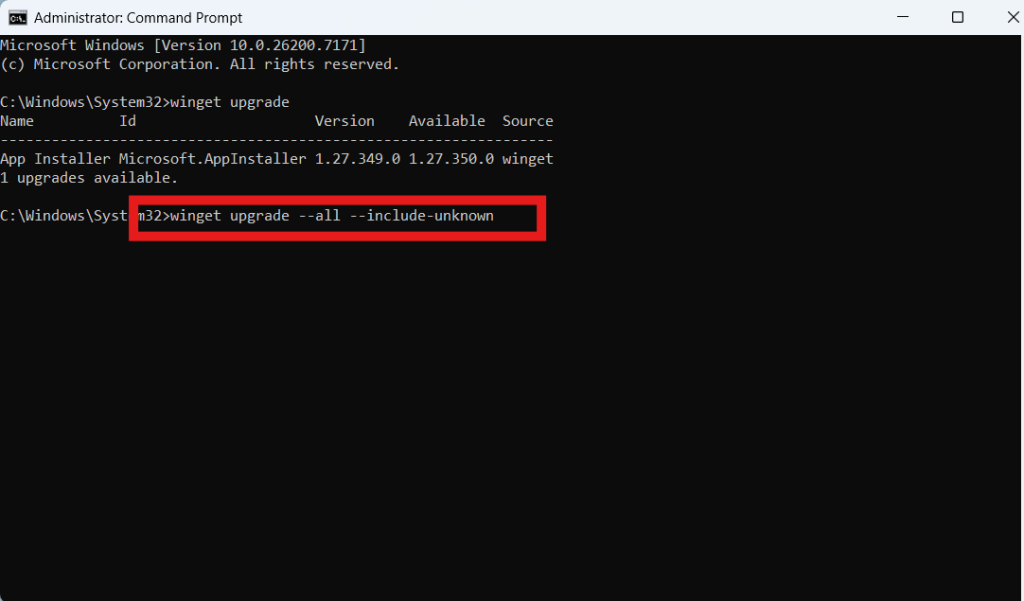
Meaning of the flags:
- –all → upgrades every app with an update available
- –include-unknown → includes apps that Winget can update but cannot confirm the version number
This ensures no app is left behind.
Winget will begin downloading and installing updates automatically. Depending on how many apps you have, the process may take a few minutes.
Step 5: Wait for the Process to Complete
Winget will show:
- Installation progress
- Success or failed messages
- Version information
Most updates finish silently in the background. You can continue using your PC during installation.
Winget ensures your applications remain up to date without requiring manual downloads or installers.
Step 6: Restart Your PC (Recommended)
Although not always required, restarting helps complete:
- Software migrations
- System-level updates
- Background service changes
- Library upgrades
Now your applications are fully updated, and you’ve successfully learned how to upgrade installed applications on Windows 11 using Winget.
Benefits of Using Winget to Upgrade Applications
Here’s why Winget is a must-use tool:
1. It saves time
No need to manually check every application.
2. It improves security
Old software can contain vulnerabilities.
3. It increases system stability
Apps run smoother when kept updated.
4. It updates Store and non-Store apps
Unlike the Microsoft Store, Winget handles almost everything.
5. It runs silently
No pop-ups or installers needed.
6. It works with automation
You can schedule Winget commands using Task Scheduler.
Troubleshooting Common Winget Problems
If Winget doesn’t update your apps, try these solutions:
1. Update Winget itself
winget source update
2. Reset Winget sources
winget source reset --force
3. Repair Microsoft Store
Settings → Apps → Installed Apps → Microsoft Store → Advanced options → Repair
4. Run system file repair
sfc /scannow
DISM /Online /Cleanup-Image /RestoreHealth
5. Update PowerShell
Sometimes outdated PowerShell versions cause issues.
6. Install missing .NET frameworks
Some apps require them to upgrade.
Microsoft provides installation troubleshooting here (DoFollow):
https://support.microsoft.com/windows
Video Guide:
FAQs About How to Upgrade Installed Applications on Windows 11
Is Winget safe?
Yes. Winget is developed by Microsoft and verified for security.
Does Winget update Store apps too?
Yes. It updates Store and non-Store applications.
Do Winget updates require admin access?
Only system-wide apps require admin access.
What if an app fails to update?
Try running:
winget upgrade --all
Or install that app manually.
5. Does this work on Windows 10?
Yes, but Windows 11 has better compatibility.
How often should I update apps?
Weekly is ideal. You can automate Winget using Task Scheduler.
Check This Out