
Introduction
If you’re trying to fix delay boot issue on Windows PC, you’re probably facing slow startup times, long loading screens, or a system that takes forever to reach the desktop. This problem is more common than most users realize. Windows often doesn’t use the full power of your CPU during the boot process, which can cause long delays before the system becomes usable.
Fortunately, Windows includes a built-in option that lets you enable all your processor cores during startup. When set correctly, your system boots faster, loads services quickly, and eliminates the sluggish delay many users experience.
This guide expands your simple script into a complete, beginner-friendly tutorial to fix delay boot issue on Windows PC, along with FAQs, performance tips, and helpful resources.
Table of Contents
Why Delay Boot Issues Happen on Windows
A delayed boot can be caused by:
- Windows using only one processor core at startup
- Too many background apps
- Corrupted startup items
- Failing hard drive
- Large startup programs
- System file corruption
- Outdated drivers
The method below focuses on processor usage. By enabling maximum CPU cores during startup, you fix one of the most overlooked factors behind slow boot times. Many users notice immediate improvement after applying these settings.
How to Fix Delay Boot Issue on Windows PC (Step-By-Step Guide)
Your script is correct. Below is the expanded and refined version.
Step 1: Type “msconfig” and Hit Enter
- Press the Windows +R key
- Type msconfig
- Press Enter
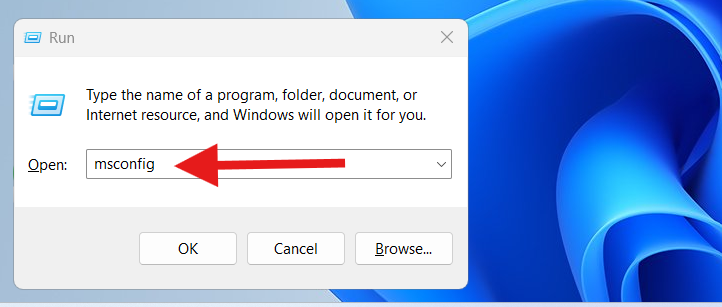
This opens the System Configuration window.
System Configuration controls:
- Startup behavior
- Boot settings
- Services
- Performance options
This is the main tool we’ll use to fix delay boot issue on Windows PC.
Step 2: Click on the Boot Tab
Inside System Configuration:
- Navigate to the Boot tab
- Select your Windows installation (usually Windows 10 or 11)
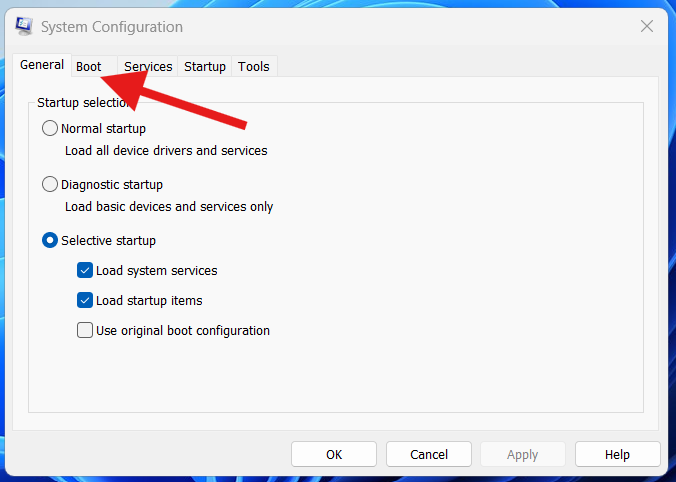
From here, we can access advanced boot settings that impact system startup speed.
Step 3: Go to Advanced Options
- Click Advanced options…
- A new window labeled BOOT Advanced Options appears
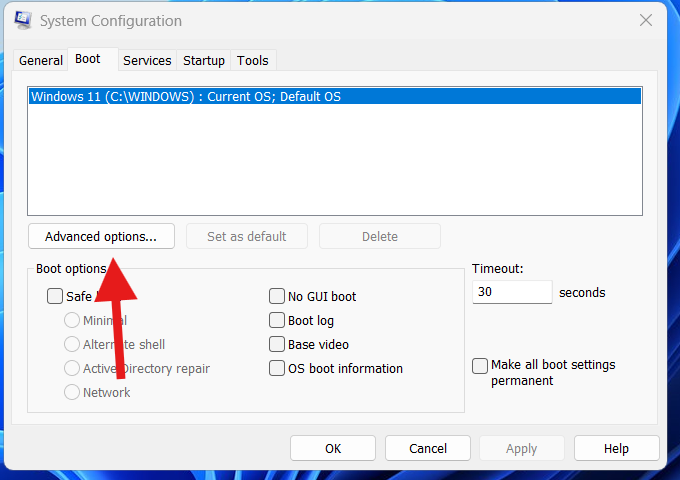
This window contains settings for:
- Processor count
- RAM usage
- Debug options
We’ll focus on setting the maximum number of processors.
Step 4: Click on “Number of Processors” and Set Maximum Value
- Check the box next to Number of processors
- Open the dropdown menu
- Choose the highest number available
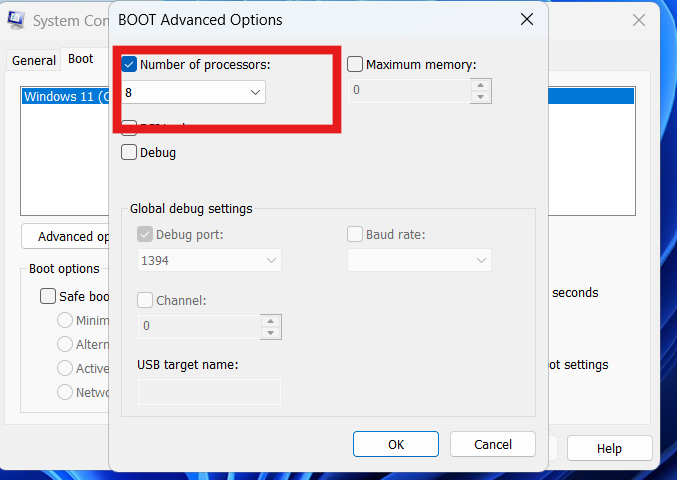
For example:
- Dual-core CPU → 2
- Quad-core CPU → 4
- Hexa-core CPU → 6
- Octa-core or higher → 8+
By default, Windows may only use one core during boot. Setting maximum cores ensures your system uses full CPU capability, helping fix delay boot issue on Windows PC almost instantly.
Step 5: Click OK and Apply Changes
- Click OK to close Advanced Options
- Back in the main msconfig window, click Apply
- Click OK
Windows will ask you to restart your PC.
Step 6: Restart the PC
Restarting applies the new settings and activates all CPU cores during startup.
Most users notice:
- Faster boot time
- Reduced black screen delays
- Faster loading of startup programs
- Smoother login experience
You have now applied one of the most effective methods to fix delay boot issue on Windows PC.
hy This Method Speeds Up Boot Time
Windows often uses only one processor core for boot, even on systems with powerful CPUs. This causes slow initialization of:
- Startup apps
- Background processes
- Services
- Drivers
- Windows shell
By enabling the full number of processor cores, Windows loads components in parallel instead of sequentially.
Benefits:
- Faster overall boot
- More responsive startup experience
- Reduced delay before apps become usable
- Better performance for older laptops
Microsoft explains advanced boot options here (DoFollow):
https://learn.microsoft.com/en-us/troubleshoot/windows-client/performance/advanced-boot-options
Additional Tips to Speed Up Boot Time
If you want even better performance, try these too.
1. Disable Unnecessary Startup Programs
Press Ctrl + Shift + Esc → Startup → Disable unwanted apps.
2. Enable Fast Startup
Control Panel → Power Options → Choose what power buttons do → Turn on fast startup.
3. Clean Temporary Files
Settings → System → Storage → Temporary files → Remove.
4. Update Drivers
Outdated drivers slow down boot.
Intel, NVIDIA, AMD drivers:
https://www.intel.com/download-center
https://www.nvidia.com/Download
https://www.amd.com/en/support
5. Run System File Check
Open CMD as admin:
sfc /scannow
6. Check Disk Health
Run:
chkdsk /f /r
A failing HDD or SSD slows startup drastically.
7. Free up C Drive Space
If your system drive is full, boot time suffers.
Internal link: /free-up-c-drive-space
Video Guide:
FAQs About How to Fix Delay Boot Issue on Windows PC
Is enabling all processor cores safe?
Yes. It does not damage hardware. It simply lets Windows use full CPU power at boot.
Will this improve gaming performance?
No. This only affects startup speed, not in-game performance.
Why does my computer still boot slowly?
Other reasons include:
Too many startup apps
Corrupted Windows files
Bad HDD/SSD
Malware infections
Low RAM
What if my msconfig shows only 1 processor?
Your CPU may not support multiple cores, or virtualization settings may be disabled in BIOS.
Do I need to restart after changing processor settings?
Yes. Restarting is required for the change to apply.
Is this method helpful on HDD systems?
Yes, but upgrading to an SSD offers the biggest improvement.
You Can Check this Too..
Upgrade Installed Applications on Windows 11 With This Simple Guide