Introduction
BitLocker Windows 11 issues can be frightening, especially when your laptop suddenly shows a blue recovery screen asking for a BitLocker key you don’t remember. Many users panic at this point, thinking their data is lost forever. The good news is that in most cases, your data is still safe, and Windows provides built-in recovery paths to help you regain access.
BitLocker is designed to protect your data, but after Windows updates, BIOS changes, TPM resets, or hardware modifications, it can trigger a recovery mode. This article explains how to fix the Windows BitLocker blue screen on Windows 11, exactly following your script, and expands it into a clear, step-by-step recovery guide.
Table of Contents
What Is BitLocker in Windows 11
BitLocker Windows 11 is Microsoft’s built-in disk encryption feature. It protects your files by encrypting the entire drive so that unauthorized users cannot access your data if the device is lost or stolen.
Key points about BitLocker:
- It encrypts system and data drives
- It uses TPM (Trusted Platform Module)
- It protects data even if the drive is removed
- It activates automatically on many Windows 11 laptops
BitLocker is a security feature, not a virus or error, even when it shows a recovery screen.
Microsoft’s official BitLocker overview (DoFollow):
https://learn.microsoft.com/en-us/windows/security/information-protection/bitlocker/bitlocker-overview
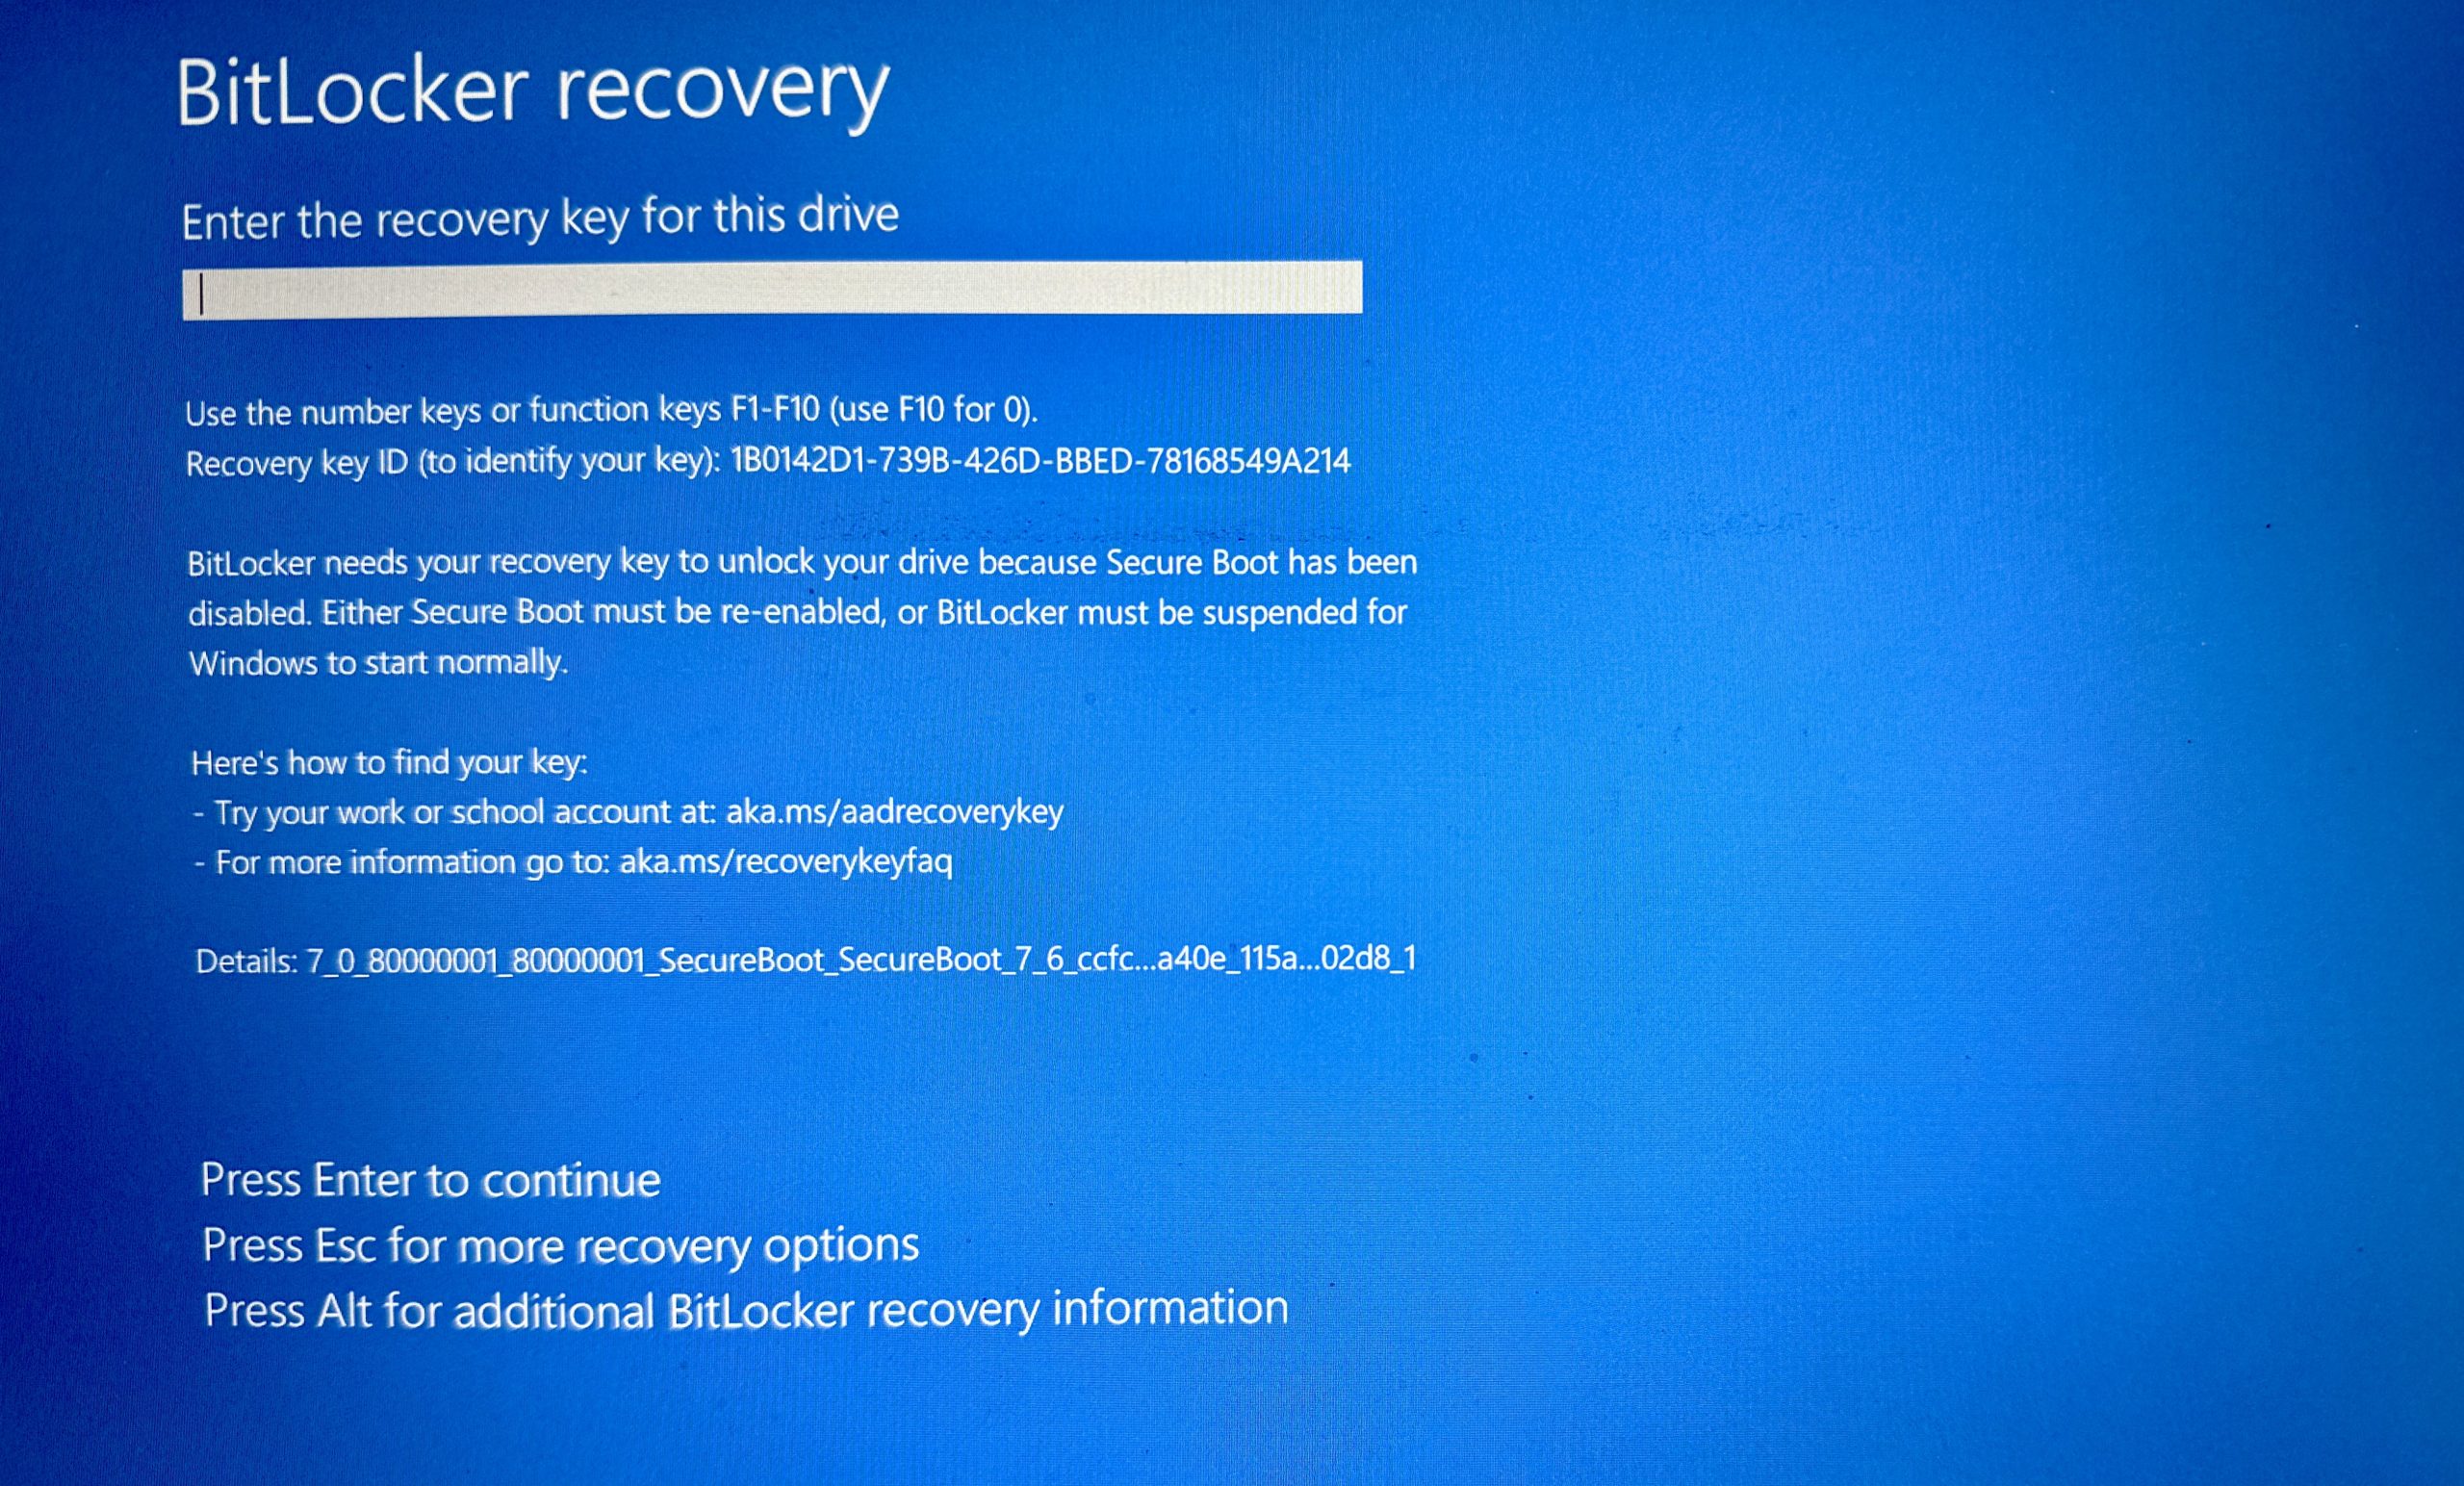
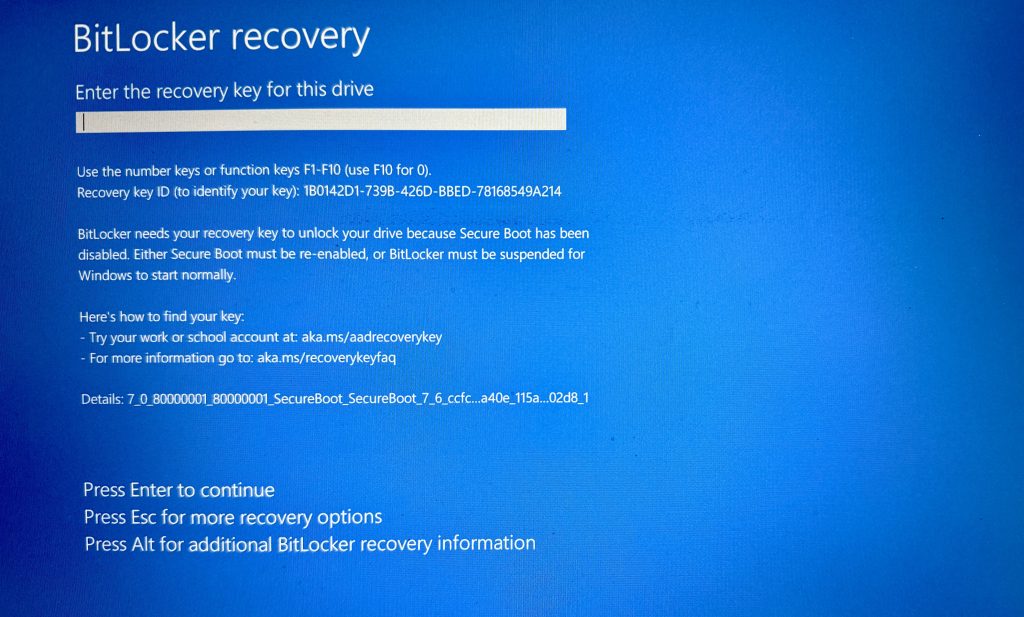
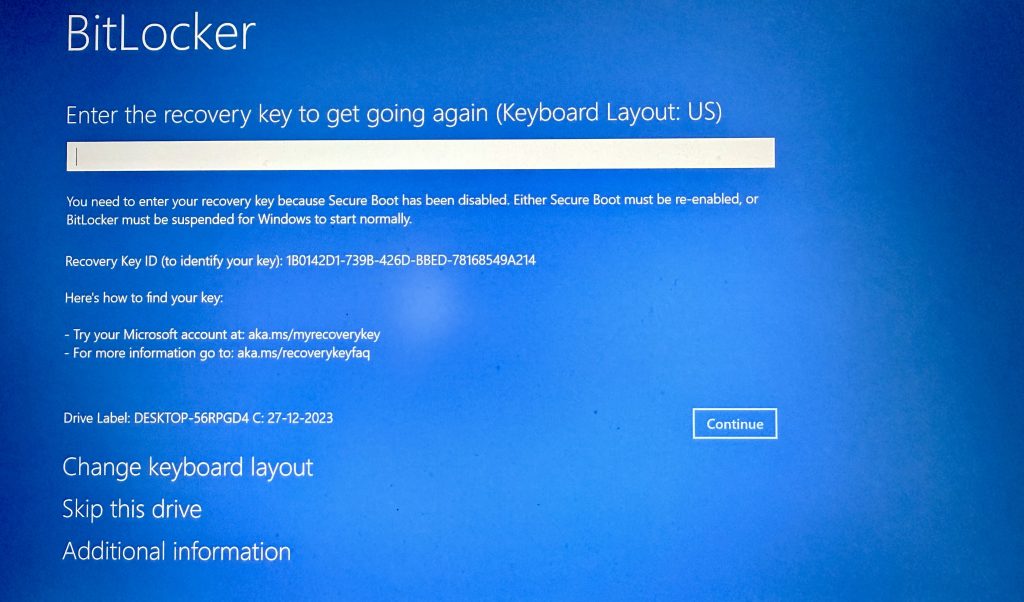
Why BitLocker Blue Screen Appears on Windows 11
The BitLocker recovery screen usually appears when Windows detects a security-related change, such as:
- BIOS or UEFI updates
- TPM reset or failure
- Windows 11 major updates
- Motherboard or hardware changes
- Boot order changes
- Secure Boot toggled on/off
When this happens, BitLocker Windows 11 pauses access until the recovery key is verified.
BitLocker Windows 11 Blue Screen Fix (Step-by-Step Guide)
Now let’s walk through your script in detail and expand it into a complete recovery process.
Step 1: Press Escape on the BitLocker Screen
When the BitLocker blue recovery screen appears:
- Press Esc on your keyboard
This allows you to access additional recovery options instead of entering the key immediately.
Step 2: Click on “Skip This Drive”
- Select Skip this drive
This does not delete data. It simply tells Windows you want to troubleshoot instead of unlocking immediately.
Step 3: Go to Troubleshoot
- Click Troubleshoot
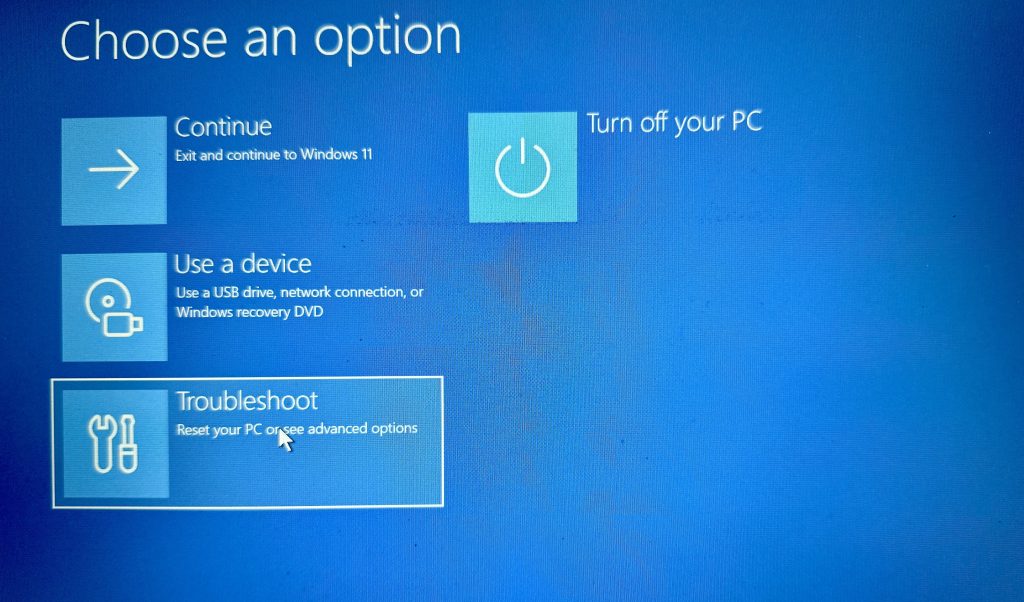
This opens Windows Recovery Environment (WinRE), where advanced repair tools are available.
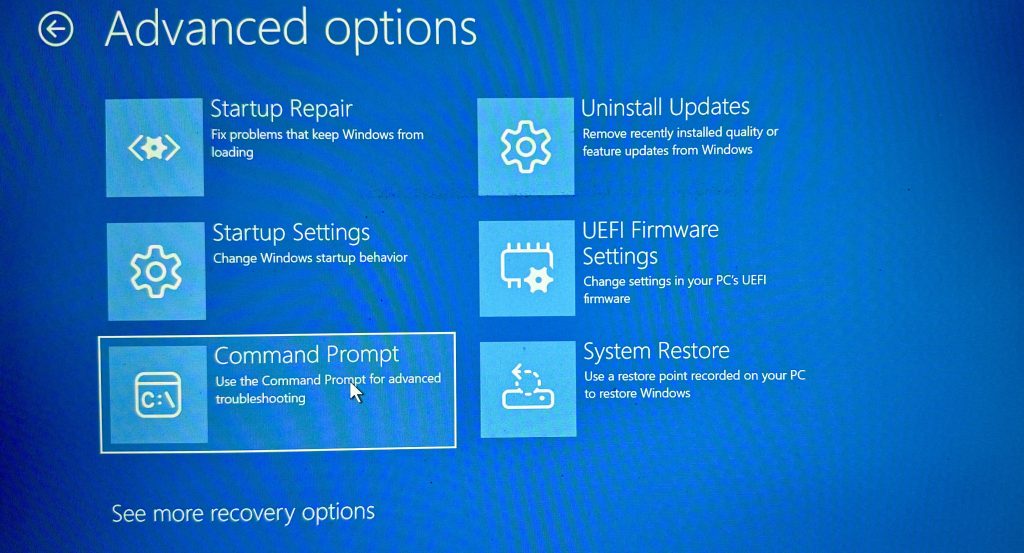
Step 4: Click on Advanced Options
- Inside Troubleshoot
- Click Advanced options

This menu gives you access to system-level recovery utilities.
Step 5: Open Command Prompt
- From Advanced options
- Click Command Prompt
Your system may restart and ask for your Windows account password.
Step 6: Type notepad and Press Enter
Inside Command Prompt:
notepad
Press Enter.
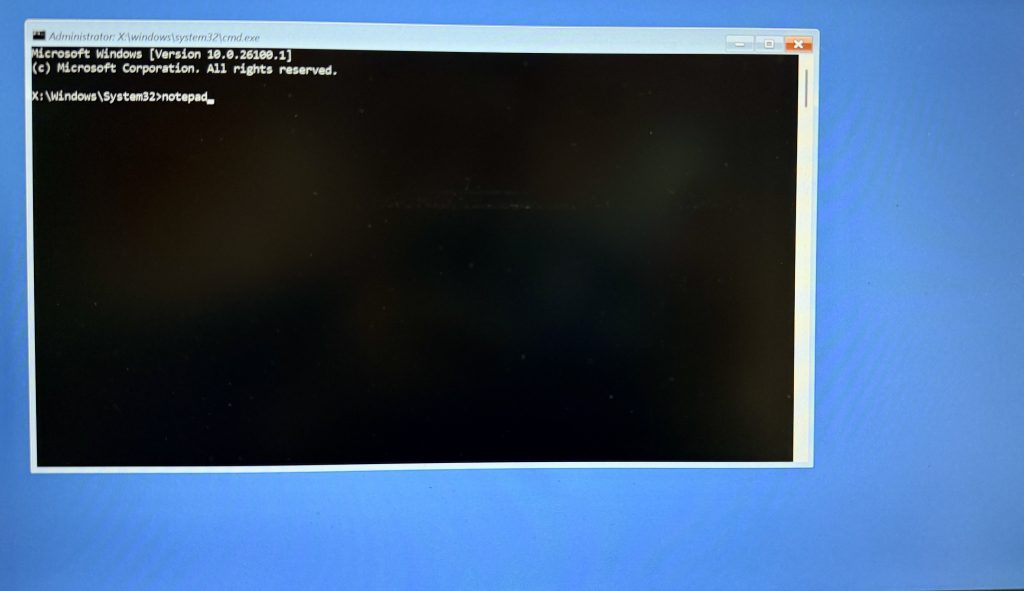
Notepad opens, but here it’s used as a file explorer workaround.
Step 7: Click File → Open
- In Notepad, click File
- Select Open
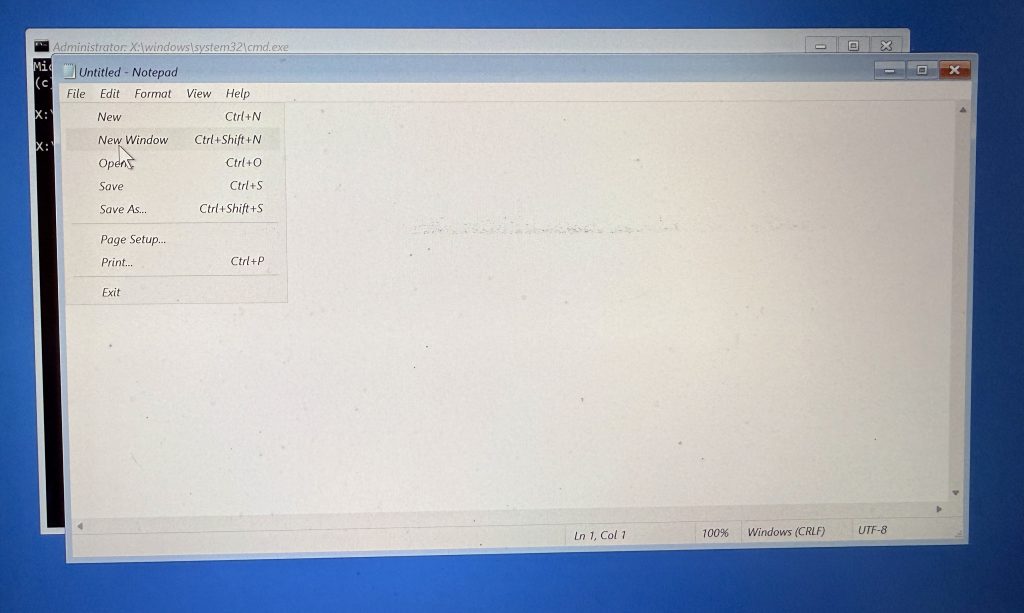
This opens a file browser window.
Step 8: Search for Your BitLocker Recovery Key
- Browse through:
- Local drives
- USB drives
- External storage (if connected)
Look for files containing:
- “BitLocker Recovery Key”
- “RecoveryKey.txt”
- Text or document files where the key may have been saved
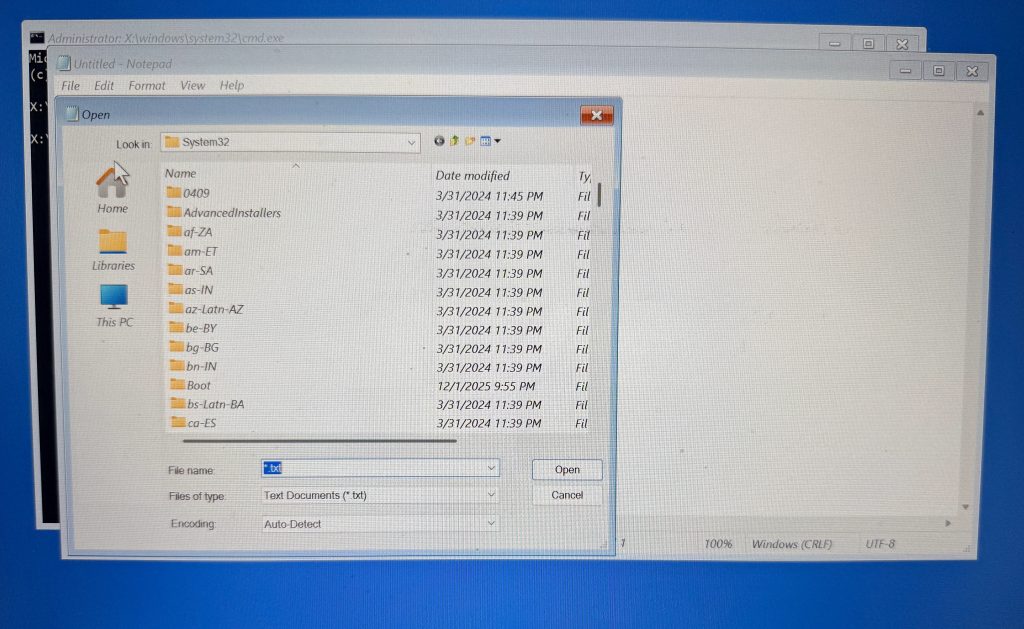
If you find the key, note it down carefully. This completes the fix for your bitlocker windows 11 blue screen.
What If You Don’t Find the BitLocker Key
If the key is not found locally, do not panic. Your data may still be recoverable.
Possible next locations for the BitLocker key:
- Microsoft account
- Azure Active Directory (work laptops)
- Company IT administrator
- Printed recovery document
- USB drive used during setup
Microsoft recovery portal (DoFollow):
https://account.microsoft.com/devices/recoverykey
You mentioned “I will show in next part” — this is exactly where the next recovery step continues.
Common Mistakes to Avoid During BitLocker Recovery
When dealing with bitlocker windows 11, avoid these mistakes:
- Force formatting the drive
- Randomly entering incorrect recovery keys
- Resetting Windows without backup
- Disabling TPM blindly
- Removing the hard drive
These actions can permanently lock your data.
How to Prevent BitLocker Issues in the Future
After recovery, follow these best practices:
1. Backup Your BitLocker Key
Save it in:
- Microsoft account
- Password manager
- Printed copy
2. Avoid BIOS Changes Without Preparation
TPM and Secure Boot changes trigger BitLocker.
3. Keep Windows Updated Properly
Incomplete updates can corrupt boot files.
Internal link: /windows-11-security-update
4. Avoid Sudden Power Loss
Use a UPS for laptops and desktops.
5. Free Up System Space
Low disk space can affect encryption services.
Internal link: /free-up-c-drive-space
Video Guide
FAQs – BitLocker Windows 11
Is BitLocker Windows 11 safe?
Yes. It is one of the most secure disk encryption systems available.
Does BitLocker delete my data?
No. It only encrypts data; it does not erase files.
Why did BitLocker turn on automatically?
Many Windows 11 devices enable BitLocker by default.
Can I disable BitLocker after recovery?
Yes, but only after successfully unlocking the drive.
What happens if I lose the recovery key?
Without the key, encrypted data cannot be accessed.
Does BitLocker affect performance?
Minimal impact on modern systems with SSDs.